Posted on

How to move the aircraft from one position to another without flying there

Remember the old Microsoft FSX term “Slew”? How do you do that in X-Plane without using a dedicated plugin?

Pause your flight.

Call up the map [M] or use the IOS [Instructor Operating Station]:

Click on the aircraft  icon labelled “You” and it turns yellow:

image.jpeg

Drag the yellow icon where you want it, or fill in the Latitude and Longitude co-ordinates and the Altitude.

The map only shows one scenery tile. If you want to drag the icon to a position off the map, move it a little past the edge of the tile, release the mouse and after a second or two the new tile will load with the icon in the middle of the map.

Close the map and un-pause. If you are in flight, expect the aircraft to jump and dive or roll, but you can easily pull out of the dive if you have enough height. If you are on the ground it is straightforward to move to another part of the airport, but if you are thinking about longer distances, be careful not to drag into a mountain or X-Plane will crash. If such a danger exists, rather increase the altitude of the aircraft (while still paused in the map view), move the aircraft, and then adjust the altitude down again before un-pausing.

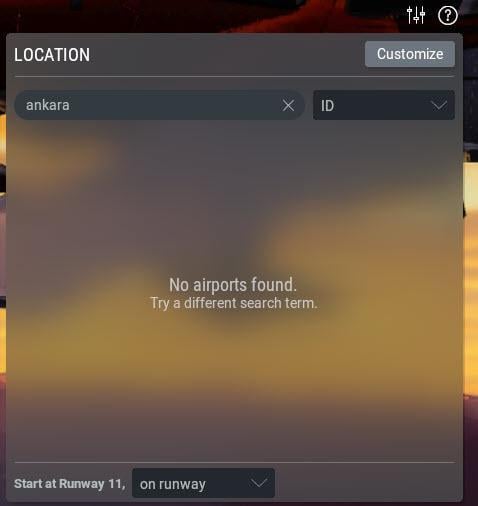
image.jpeg
Posted on

What if your Departure Airport is not listed?

When you choose your departure airport, you usually type in the city name or the airport name and X-Plane shows you a list of matches, and you select one of them.

However, sometimes X-Plane does not seem to know about an airport even though it should. For example, if you wanted to depart from Ankara, you would get a screen like this:

image.jpeg

But that’s crazy!… Ankara is a major city…

Go to Google or Bing and search for the ICAO code of Ankara

image.jpeg

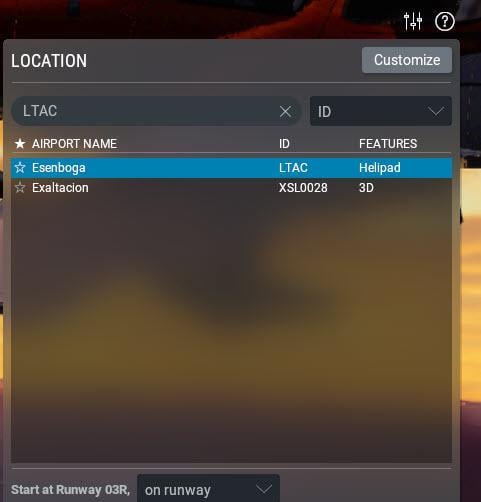
Now in X-Plane’s Location panel, instead of typing in of Ankara, type LTAC

image.jpeg

And this time, it comes up with the airport name Esenboga, which is Ankara’s main international airport. 

Posted on

Scrubbing the flight path

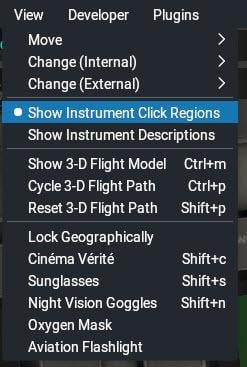
Did you know that X-Plane can display your flight path? It does this by displaying a very thin purple line extending back from the aircraft to the point where you began your flight. 

image.jpeg

To make this flight path visible, first pause the flight image.jpeg, then apply the image.jpegimage.jpegcombination, and the flight track appears.

It get’s interesting, however, when you then enable replay mode image.jpegimage.jpeg. Now, you can scrub the timeline to move the aircraft to any position on this purple line. The line in front of the aircraft is not erased, so you can  inspect where you were, what your path was, and exactly how you flew from that scrubbed point onwards.
NOTE: “Scrubbing” is a term used in the video industry to refer to the ability to quickly navigate through a video by dragging a slider or timeline bar back and forth. Scrubbing allows you to quickly navigate through the replay and find the exact position of interest in the flight.

Sometimes, it is difficult to see this thin purple line, so pressing image.jpegimage.jpeg again creates a translucent “curtain” extending from the purple flight path track to the ground. Personally I find this “curtain” more confusing than the plain thin purple line.

Pressing image.jpegimage.jpeg a third time turns the flight path track off.

Posted on

The most useful view control of all

Here is a very basic tip that some X-Plane users use “instinctively” and thereafter find obvious, while others have never discovered it. An astonishing number of users have asked me if there isn’t a better, easier way to pan around than using keyboard shortcuts, assigning keystrokes to joystick buttons, or using an awkward “hat” switch.

The answer is, of course, yes.

Right-drag the mouse.

Simply hold the right mouse button down and move the mouse, and the whole view smoothly pans up/down/left or right, depending on where you drag the mouse. 

Posted on

F13 – F24

Some shortcuts are programmed using the phantom keys F13 to F24, which, of course, don’t exist on most keyboards.

We access them by using the Shift Key as follows:

F13 is accessed by pressing image.jpegimage.jpeg

F14 is accessed by pressing image.jpegimage.jpeg

F15 is accessed by pressing image.jpegimage.jpeg

F16 is accessed by pressing image.jpegimage.jpeg

F17 is accessed by pressing image.jpegimage.jpeg

F18 is accessed by pressing image.jpegimage.jpeg

F19 is accessed by pressing image.jpegimage.jpeg

F20 is accessed by pressing image.jpegimage.jpeg

F21 is accessed by pressing image.jpegimage.jpeg

F22 is accessed by pressing image.jpegimage.jpeg

F23 is accessed by pressing image.jpegimage.jpeg

F24 is accessed by pressing image.jpegimage.jpeg

Posted on

“Half” Start with Engines Running

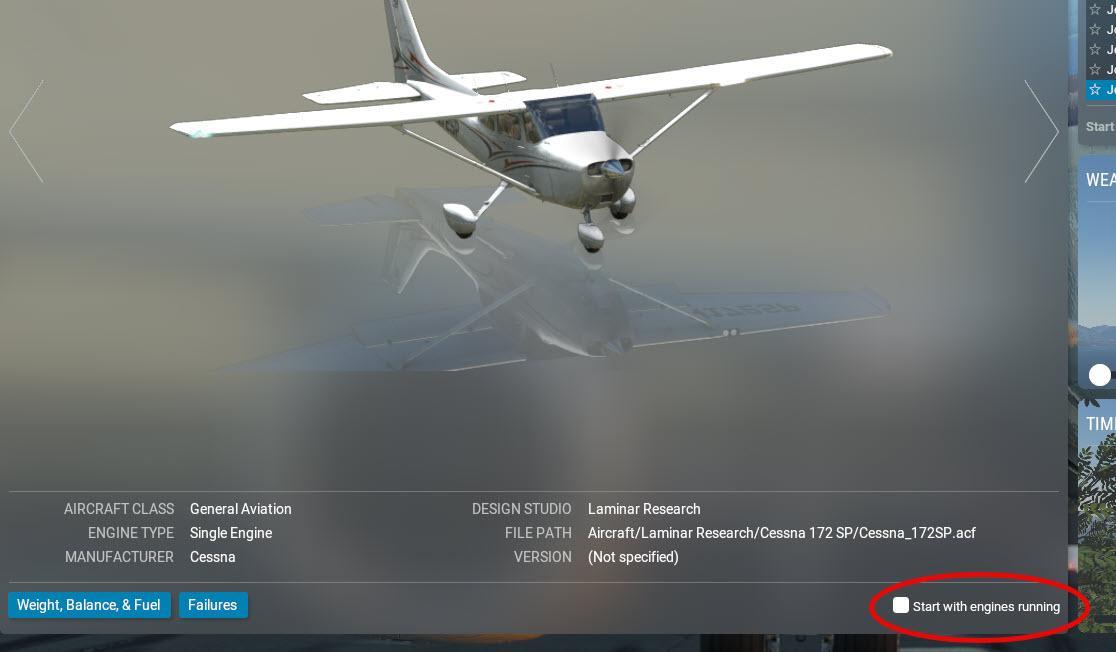
Serious pilots usually always start a “full” flight from a cold and dark state by keeping this box unchecked:

image.jpeg

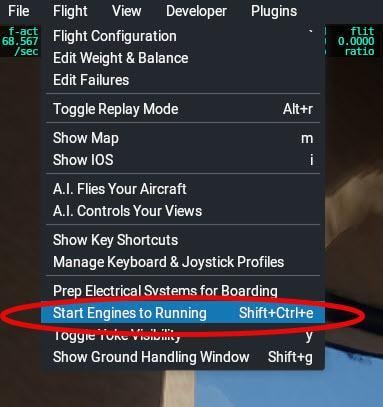
However, did you know that you can accelerate your start procedure by clicking the pull-down option “Prep Electrical Systems for Boarding”. 

This has the effect of instantly setting up the initial electrical systems: avionics, transponder standby, lights etc.  
This is the full list :

– battery on
– generator off
– inverter on (for planes that have it)
– cross tie switch on (for planes that have it)
– avionics power on
– transponder standby
– gnd service bus off
– nav and beacon lights on
– landing and taxi lights off

If you then get impatient and want to start into an “Engines Running” state, the next pull-down option enables the full “cheat”:

image.jpeg

The keyboard shortcut for starting all the engines to running is image.jpegimage.jpegimage.jpeg
This can be used even when your flight has already begun in “Cold and Dark” mode.

Posted on

Mastering the Dreaded Curved Arrow Switch pop-up

Most users new to X-Plane often have difficulty physically manipulating switches. That curved pop-up arrow never seems to work the way you think it should. It’s actually very simple once you understand it.

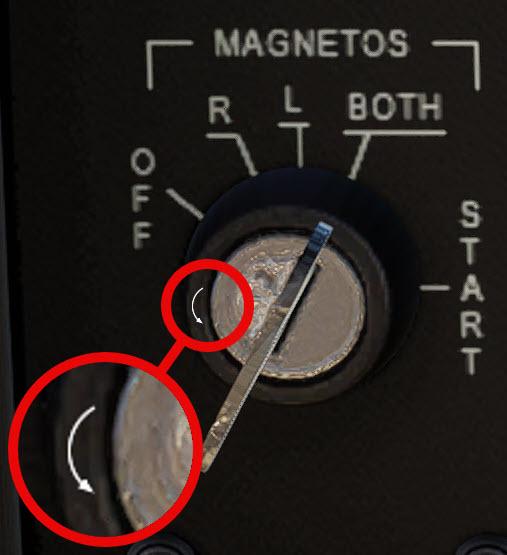
Let’s take an example of the magneto switch. It is moved anti-clockwise towards the off position by when the Curved white arrow appears. But how?

image.jpeg


• Move the mouse over the key-switch until either a clockwise or an anticlockwise curved arrow appears.
• Then, click the mouse or roll the mouse wheel while the curved arrow is visible.

Light switches are turned off by clicking when the white arrow appears and points downwards.

Rocker switches are turned off when you click as the white arrow points down when the cursor is moved over the lower part of the rocker.

Posted on

Resume Flight vs Load Flight

If you save your flight (as a situation) while still flying, then quit X-Plane, when you press the RESUME LAST FLIGHT icon at the main menu, you might be surprised to find that X-plane will not behave quite as you might expect.

X-plane will NOT put you back in the sky where you were. Instead, when X-Plane loads you will be placed on the ground at the nearest airstrip to where you were when you quit X-Plane. 

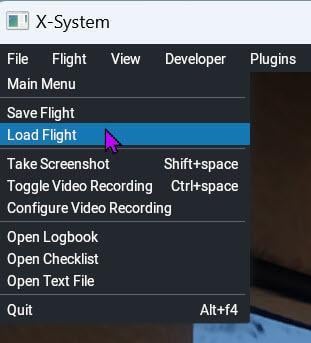
To actually resume your flight (where you were in the air), you need to Load the Flight from the File drop-down menu:

image.jpeg

Now you will be placed back where you were when you saved the flight.

Please note that not everything is actually saved (like replays or custom datarefs), particularly if you are flying a complex add-on aircraft.

Posted on

Taxi with a large aircraft

In large commercial aircraft, a nosewheel tiller is used to more accurately align the nosewheel to the taxi lines, and to get the aircraft safely docked at jetways.

You can assign an axis on your joystick to control this tiller by opening Settings –> Joystick and look for an axis that you have not assigned to anything. Every axis that X-Plane recognizes on your peripheral(s) will be listed In the AXES column. Once you have found an available axis assign it to nosewheel tiller. This will not interfere with the pedals axis or the yaw axis.

Note that this is the same procedure used in setting up the joystick axes normally, as described in the section “Configuring Flight Controls” in the X-Plane online manual.

The nosewheel tiller is used to make larger turn corrections when taxi-ing and the rudder pedals are used to make small inputs such as on takeoff roll and final alignment to your jetway.