Posted on

Some Bullet-form Tips for Using X-Plane 12

Stability

  • Disable Unnecessary Plugins. Unused or incompatible plugins can tank performance. This is the #1 Stability tip of all time. Don’t just disable them; remove them from the directory hierarchy.
  • Optimize, but do not overclock your CPU or your graphics card
  • Cool your motherboard, RAM, and M2 SSDs. More than passive chassis fan cooling is required.
  • Use a UPS [UN-interruptible Power Supply] and an over-specced PSU [Power Supply Unit]

Graphics Optimization

  • Tweak Render Settings. Lower the visual effects (e.g., shadows, reflections, and antialiasing) if performance lags. Balance quality and frame rate for your hardware.
  • Try FSR (FidelityFX Super Resolution). X-Plane 12 supports AMD FSR, which can boost performance without significant visual loss.
  • Monitor VRAM Usage: High texture settings can overload your VRAM. Use the “Texture Quality” slider to optimize.

Aircraft Handling

  • Calibrate Controllers. Properly calibrate yokes, pedals, and throttle quadrants in the settings menu to ensure smooth aircraft control.
  • Adjust Control Sensitivity. Use the sensitivity sliders to fine-tune aircraft response, especially if it feels too twitchy.
  • Study the Flight Model Adjustment. X-Plane’s physics engine is advanced – experiment with “Flight Model per Frame” in the settings if you encounter unrealistic behaviour.

Weather System

  • Real Weather Accuracy. Ensure you’re connected to the internet for real-time weather updates. If the weather seems incorrect, force a refresh in the settings.
  • Adjust Turbulence Sensitivity. The new weather system is more dynamic. If turbulence feels overdone, tweak the realism sliders.

Customizing Views

  • Save Custom Camera Angles. Use the [Ctrl] + [number keys] to save cockpit or external views and quickly recall them with the corresponding number key.
  • Use Free Camera Mode. [c] or [Shift] + [4] activates free camera mode, great for screenshots or inspecting scenery.

Multiplayer and ATC

  • Use Default ATC. While not perfect, X-Plane 12’s ATC has improved tremendously over the past year. The latest update, 12.1.3 (about to be released – Time of writing: Late November), contains a huge ATC system update.
  • If you feel more confident, join online networks like VATSIM, IVAO, or PilotEdge for realistic ATC and multiplayer flying.

Posted on

Smoother Display, Less Stutters

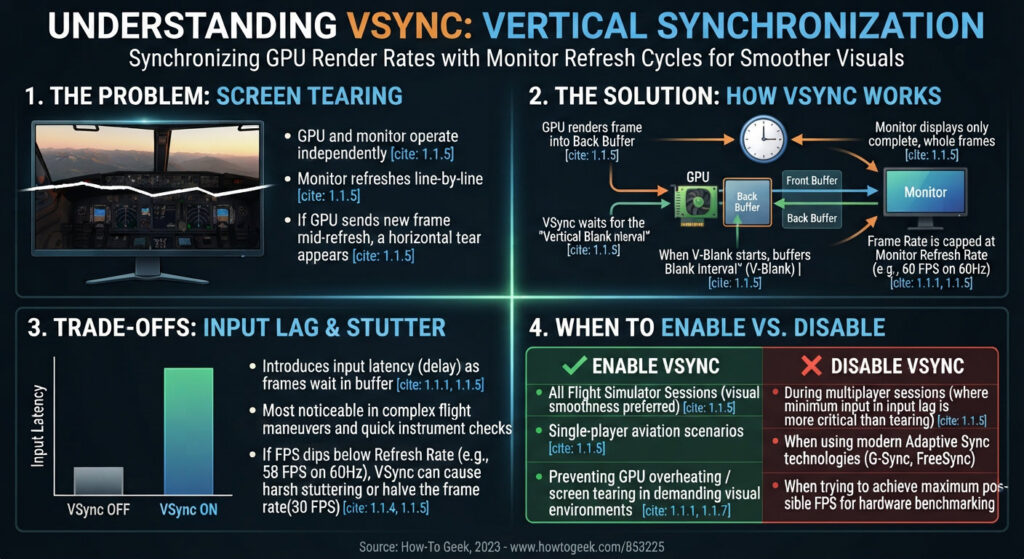
As you fly in X-Plane 12 your frame rate is continually changing depending on the current graphic load. If you have a high-end graphics adapter and CPU, or if you tend to fly in country scenic areas far from big cities, you may find that you are “wasting” frames but are still subjected to slight stuttering.

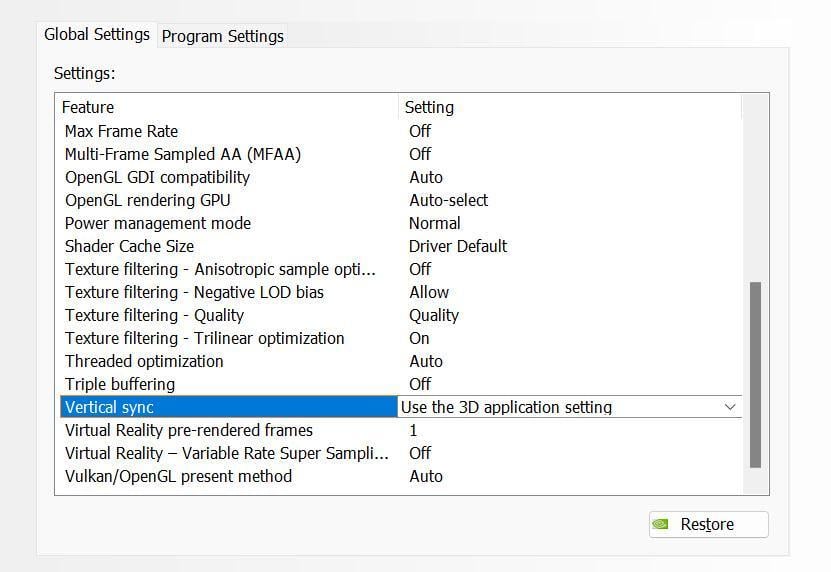
The VSYNC setting can help. Vsync, short for monitor vertical synchronisation, is a setting in X-Plane that helps smooth out visuals. It works by matching the frames your computer generates (frame rate) with the rate your monitor refreshes the image (refresh rate). The NVIDIA driver also has a Vsync setting which accomplishes more or less the same thing. However, they don’t work together, so first instruct the Nvidia Driver to “Use the 3D application setting” :

image.jpeg

Then tick the Vsync checkbox (located at the bottom of the X-Plane Graphics Settings screen):

image.jpeg

Before using this tweak, make sure that Windows has correctly identified your monitor and has applied the maximum frame rate.
If you have low-end hardware, you may find that the penalty for using VSYNC is a slight slowdown of X-Plane. There should be little or no penalty for high-end equipment.

Try this out and see if it helps. If the result is worse, you can always uncheck the Vsync box.

For an explanation of how Vsync works with X-Plane click here

Posted on

Blurry Textures

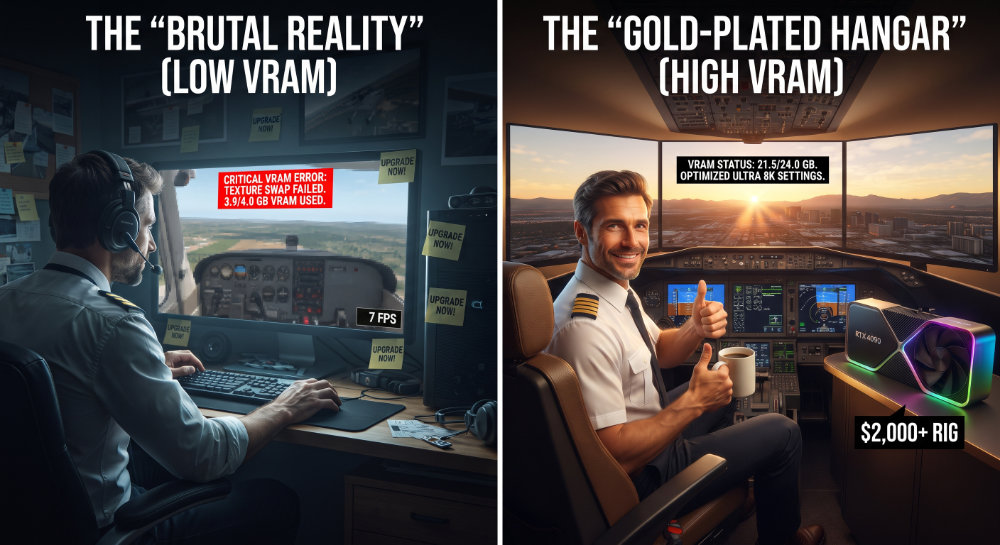
This is a “Tip” only in the most brutal sense. It’s more of an explanation of a bad X-Plane experience!
If you are getting blurry textures – particularly noticeable with high-resolution payware addons – It is most likely that you do not have enough VRAM built into your graphics card.

If you start running out of VRAM, X-Plane won’t crash; instead it will simply make your textures “blurry” to effectively reduce VRAM usage and fit everything into the available video memory.

Many payware addons have a “recommended VRAM requirement” which is nowhere near the “minimum X-Plane 12 requirement”.
With recent improvements to X-Plane 12 more and more stuff is being handled by the Graphics card and unfortunately older Graphics cards with less VRAM are beginning to no longer be fit for purpose.
If your graphics card is fitted with 6GB or less you are bound to have a less than clear display even on a lower-resolution monitor. You may also start getting “device loss errors”.
For a decent visual X-Plane experience you will need a minimum of 8GB VRAM, and more realistically 12GB VRAM. If you are making a purchase for long-term sustainability, “bite the bullet” and look at a GeForce RTX 3090 or a 4090 which has 24GB.

If money is no object, the new GeForce RTX 5090 boasts 32GB.

Posted on

Nvidia Drivers – update or not?

The latest NVIDIA driver is not necessarily the best. Be cautious about updating it as soon as it is released. 
A better approach is to download a driver and keep the .zip archive file after installation. If you update the driver and X-Plane behaves worse, you can always revert to the older (better) driver.

Look at the specific improvements NVIDIA announces – I have never seen X-Plane specifically mentioned in any of their gaming improvement lists – but that doesn’t mean the new driver might not improve X-Plane’s performance on your machine.

Posted on

Complete Graphics Driver Removal

If you run X-Plane on a Windows Operating System and you change your graphics card, you want to make sure that every trace of the drivers for the “old” card are completely removed from both your file system and the Windows registry. Before installing new drivers for the new card, just uninstalling the drivers manually using Control Panel will not sanitize your computer entirely. To make sure that your computer is “clean” before installing your new card, download a utility called DDU – Display Driver Uninstaller. It’s freeware from a company by the name of Wagnardsoft.
I tend to be very cautious about freeware windows cleanup tools, but this one is an industry standard with the apparent backing of both Nvidia and Intel.

The official Nvidia game drivers support site publishes this description of DDU:

Quote

Display Driver Uninstaller is a driver removal utility that can help you completely uninstall AMD/NVIDIA/INTEL graphics card drivers and packages from your system, trying to remove all leftovers (including registry keys, folders and files, driver store). The AMD/NVIDIA/INTEL video drivers can normally be uninstalled from the Windows Control panel, this driver uninstaller program was designed to be used in cases where the standard driver uninstall fails, or when you need to thoroughly delete NVIDIA and ATI video card drivers. The current effect after you use this driver removal tool will be similar as if its the first time you install a new driver just like a fresh, clean install of Windows. As with any tool of this kind, we recommend creating a new system restore point before using it, so that you can revert your system at any time if you run into problems.

To download the software, click here. Choose the portable version so that it doesn’t create even more registry entries.

To uninstall the “old” Graphics Driver from your system using the Display Driver Uninstaller (DDU) software, follow these instructions (produced by Intel): 

Quote

  1. Download the latest version of the software.
    • If you download the Installer, run it, it will create a shortcut on the desktop. 
    • If you download the Portable/ self-extracting version, look for the executable and extract it. Remember the path. 
  2. Reboot into Windows* safe mode. (Refer to Start your PC in safe mode in Windows.)
  3. Look for the shortcut on the desktop (step 1.1) or the extract path chosen (step 1.2.1) and run theDDU executable.
  4. Click Close in the Options window.
  5. Select device type to GPU and select device to the one you want to remove. If you are doing a clean-up, you can choose all GPUs.
  6. Click Clean and restart or Clean and Shutdown depending on your needs.
  7. Wait for the software to finish the process. It will automatically reboot Windows to the typical mode or shutdown the system.