Posted on

LEARN HOW TO FLY – a Tip for Serious Beginner Aviators

Do you want to learn how to fly the RIGHT way? Well here’s a radical idea. Invest in an 80-year-old book!
I’m not Joking. In my humble opinion, the finest book ever written on the basics of learning to fly was written in 1944.

Title: Stick and Rudder
Author: Wolfgang Langewiesche

image.jpeg

You can get a hard copy version from Amazon

No, I don’t get a commission for recommending this – it’s just simply the best of the best

Or borrow it online for free from Internet Archive

Posted on

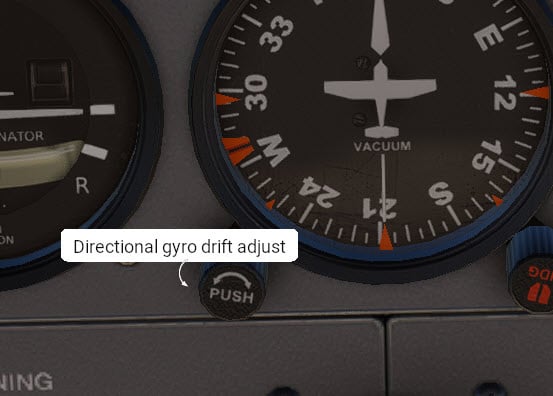
“ToolTips” visibility

In the SETTINGS page under the General tab, you can instruct X-Plane to show instrument instructions/descriptions when you hover the mouse over a clickable control in the cockpit:

tooltips-2.jpg
The result is something like a “tooltip” :

tooltips-1.jpg

The problem is that these “tooltips” can get in the way, so it’s useful to be able to turn them off by simply unticking the checkbox.

Posted on

Instructor Station on a Second Monitor

If you have a second monitor available and your graphics card can handle it, connect it to your X-plane computer and configure the settings so that one monitor is your main monitor and the other is the instructor station. This has some really useful advantages. Here are just two of them – you’ll discover lots more advantages if you play around with the instructor station:

  • You get a moving map display of your aircraft’s location
  • The aircraft that you are flying can be changed mid flight without being forced to start  a new flight
  • You can change your aircraft’s position by clicking the aircraft icon and then dragging across the moving map while watching your progress as you drag the icon in the other main monitor.

You set it up by going to Settings – Graphics and changing MONITOR1 from Unused to Instructor Operating Station

Instructor Station settingsjpg.jpg

The instructor Station monitor then looks like this:

Instructor Station panel.jpg
Posted on

How to quickly close the 2D panel of the G530

To pop-up the 2D panel of the G530 and G430 is easy – just click it. But closing it again can require a few keystrokes and is a little confusing since it is in an X-Plane-style window and not a more familiar window.
However, you can easily close it by moving the mouse cursor up to the LEFT-hand top corner of the pop-up and a small red dot will appear:

Close a popup.jpg

Clicking this red dot immediately dismisses the 2D window.
More traditionally, if you click the upper RIGHT-hand corner you can transform this pop-up into a more conventional window.

Alternatively, you can also close the 2D window by clicking on the 3D panel of the G530 and G430 a second time.

Posted on

“Hidden” goldmine of information

Did you know that in addition to the Flight School section on the massive X-Plane.org site, there is a not-so-well-known treasure trove of downloadable tutorials in the downloads section. This section has nearly 300 downloadable tutorials written by .org members who have tried to give back to the community. While some of the tutorials are new “hot off the press”, some are nearly 20 years old but even the old ones retain some wise wisdom, wonderful explanations and great tips. They are not grouped in any particular way and it’s difficult to search because you are “digging for hidden treasure” and don’t necessarily know what to search for. Take the time to  browse through this repository, you find it’s well worth it.

Posted on

Be careful about setting MTBF

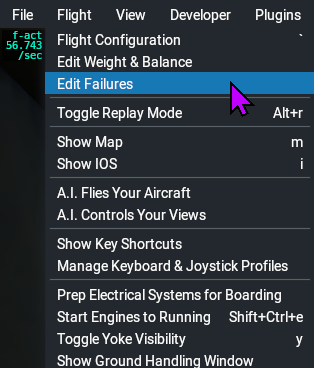
Did you know that you can set the frequency of random failures? However, strangely, this setting is not found in the SETTINGS section. Instead, the MTBF [Mean Time Between Failures] is found as an option in the Flight pull-down Menu:

Failures Pull-down.png

The failures option is also found next to the Weight, Balance & Fuel button in the initial flight customization screen:
Failures flight setup.png

When you click this menu option, in addition to being able to specify a particular failure, you are also able to set the time between random failures by entering an overall failure rate. However, this is deceptive since it means that any device will fail within the specified number of hours – BUT… Since there are currently 584 systems that can potentially fail, the specified time will have to be divided by the number of systems. So, if you expect some system to fail at least every 10000 hours (a reasonable supposition), you need to understand that statistically, you will get a failure of some random item every 17 hours.

Set MTBF.png

Now that’s all very well, but there’s a “gotcha”. The problem comes when you quit X-Plane and start a new flight sometime later. X-Plane REMEMBERS that you have set the MTBF. You, on the other hand, may have forgotten that you enabled the checkbox and set the time interval!

Therefore, a good habit to get into before undertaking a long flight is to check this as part of your pre-flight routine.


Posted on

Where NOT to install X-Plane on a Windows system

On a windows system there are certain folders which are user-write-protected. One of which is C:\Program Files which at first glance would seem to be the logical place. If you install X-plane in this folder, however, you will get all sorts of troubles, because you (or an addon-on) may not write to it.
Another bad idea is locating the X-Plane folder as a sub-folder of the special Documents folder – this results in all sorts of confusion with Microsoft OneDrive.
Make it a habit to create the X-Plane 12 folder in a first level sub-directory of the root. In other words, the ideal place for the X-Plane Folder is simply C:\X-Plane 12.
Alternatively anywhere on a secondary drive if you have one installed.

On a different but related topic, in 2025 you should not be installing X-Plane on a mechanical hard drive. The data delivery throughput is just too slow for a CPU or Graphics card capable of running X-Plane 12. Ideally, install X-Plane the fastest M.2 SSD you can afford, or at minimum on a SATA SSD. Hybrid SSHD drives (Mechanical hard drives with an SSD cache) also don’t cut it these days.

Posted on

File flight plan with ATC before entering it into the FMC

Which comes first, the “chicken or the egg”?
When you are planning an IFR flight, it’s always a good idea to file your flight plan with ATC before actually entering it into the FMC. In the days when X-Plane had a far less capable ATC system it did not matter much when you filed a flight plan in the ATC window,. You would get it from the FMC. Now that SIDs and STARs are accepted by the X-Plane 12 ATC system, if you are entering the flight plan directly into the FMS first, there is a 50/50 chance that ATC will not accept the flight plan that you proposed. Maybe your desired runway is not in operation today (weather or some other reason) or maybe a waypoint is not recognized. Then you have to go right back to the planning stage and change things around to a greater or lesser extent.

If you first put in your SID, waypoints and STAR and ATC accepts them, then you can go to the trouble of entering it all into the FMS afterwards. If you are loading your FMS from the output of your flight planner and then filing it with ATC, you run into the same problem.

While not so convenient in X-Plane because you are a “one man band”, in real aviation the flight plan is actually entered into the FMS as late as possible – certainly after the flight plan has been filed. So this tip brings us a step closer to real aviation.

Posted on

ATC in headphones and Aircraft Sounds through speakers

Most computers capable of running X-Plane are fitted with Bluetooth capability. If you have a pair of Bluetooth headphones you can easily set up a realistic system where ATC sounds are piped through the headphones while ambient aircraft sounds can be heard through the speaker output(s) of your motherboard.
First make sure Bluetooth is on and the headphones are paired.
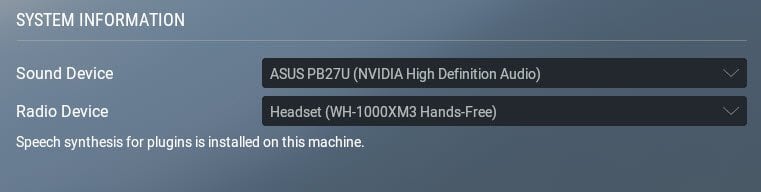
Then in the X-Plane SETTINGS –> SOUND section, assign the headphones to Radio Device and the speaker output to Sound Device as shown:

Headphone sounds.jpg

That’s all you have to do except control the respective volumes via the operating system

Extra Tip: Instead of using computer speakers or worse – the internal speakers of a monitor (as shown above), rather connect your motherboard’s Line-Out jack to the input of an old HiFi system lying forgotten in the attic with those big old speaker cabinets, and crank up the volume.
Extra Tip 2: If you don’t have an old HiFi system you can pick up mighty systems that were state-of-the-art fifty or sixty years ago quite cheaply from E-Bay or other online “classifieds” sites. Those are brilliant for an X-Plane simulator.