Posted on

Watch how ATC works

If you are a new user of X-Plane, learning to fly properly, and you are confused about how ATC works, X-Plane can help you by showing you how it is done.

Start a new flight from any metropolitan airport (Mid size – not an airstrip but not a large international). Choose a small GA aircraft. Ideally, in an area you are familiar with in real life.

Set the weather to “Marginal VFR Overcast” and precipitation at “Moderate”. Set a wind speed of  16kts at an altitude of 4000ft
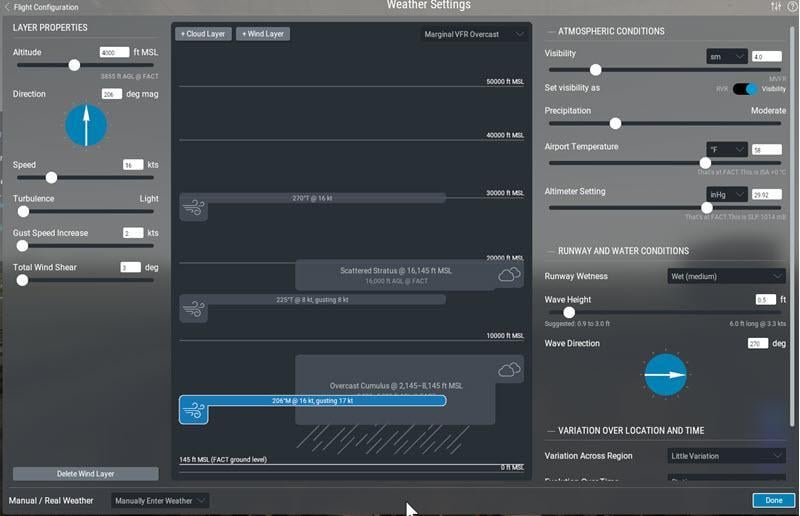
WeatherSettings.jpg

Click “A.I. Flies Your Aircraft” from the Flight pull-down menu:
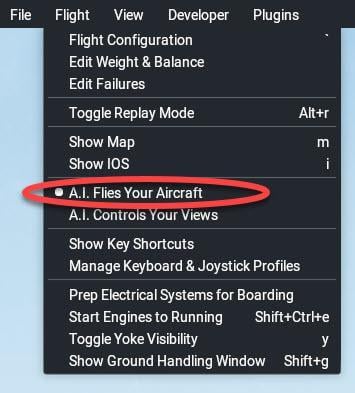
ai flies pull down.jpg

After a while, the aircraft will come to life, and you will see the ATC panel. A.I. will choose a destination airport and will automatically take off, fly the route and land. All you need to do is watch the ATC conversation and see what ATC says,  how the AI pilot replies, and then how “he” reacts. It is particularly useful to do this in cloud conditions where you cannot see the ground and quickly lose orientation. Watch how the A.I. pilot relies on instruments and ATC instructions. Watch how quickly the A.I. obeys ATC.
Once the flight is complete, try it yourself without A.I.
Remember to “read back” every communication ATC sends you.

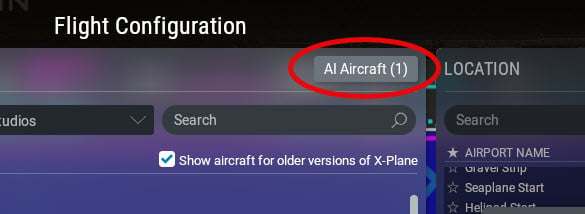
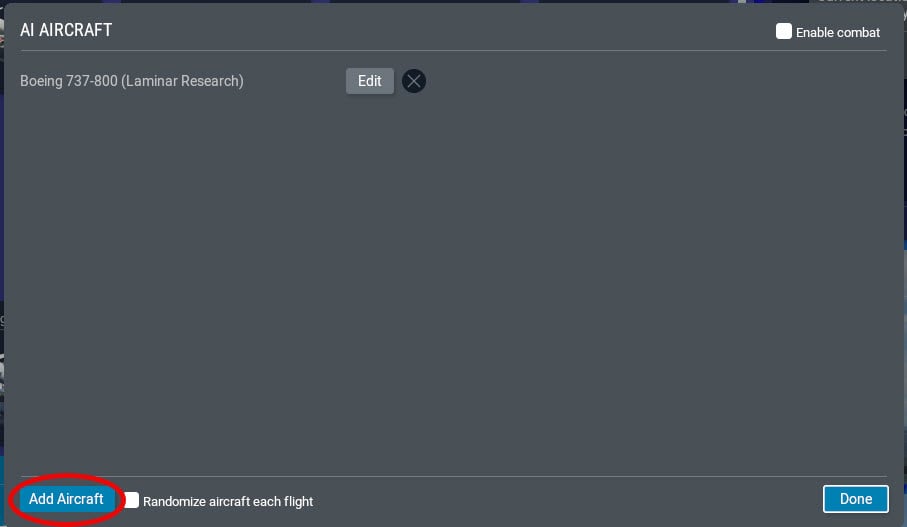
Note – when trying this tip, set the number of A.I. aircraft to zero.
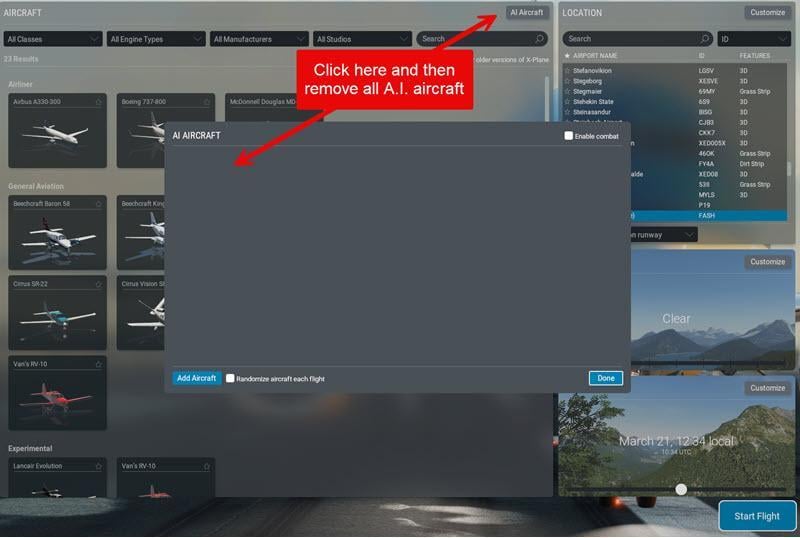
RemoveAIAircraft.jpg

When there are many A.I. Aircraft around, ATC often gets very slow.
Posted on

Taxi with a large aircraft

In large commercial aircraft, a nosewheel tiller is used to more accurately align the nosewheel to the taxi lines, and to get the aircraft safely docked at jetways.

You can assign an axis on your joystick to control this tiller by opening Settings –> Joystick and look for an axis that you have not assigned to anything. Every axis that X-Plane recognizes on your peripheral(s) will be listed In the AXES column. Once you have found an available axis assign it to nosewheel tiller. This will not interfere with the pedals axis or the yaw axis.

Note that this is the same procedure used in setting up the joystick axes normally, as described in the section “Configuring Flight Controls” in the X-Plane online manual.

The nosewheel tiller is used to make larger turn corrections when taxi-ing and the rudder pedals are used to make small inputs such as on takeoff roll and final alignment to your jetway.

Posted on

Spongey Taxi-ing with the Default Cessna C172

Have you ever cursed X-plane and swore that the simulator was not working realistically when making an initial take-off run in a Cessna C172? It seems to do all sorts of ridiculous weaving.
I am not referring to the well-known fact that it pulls to the left and is quite correctly modeled – the spiralling slipstream propwash effect – but it might surprise you that the spongey effect of steering/correction/over-correcting with the nose wildly swerving left and right is also quite realistic. Essentially the reason for this spongey effect is because the real cessna 172 does not have a direct mechanical link to the rudder, but uses a spring-loaded system.
This effect is actually correctly modeled in X-plane despite your screaming at your yoke in frustration!.

For an explanation of what is actually happening, have a look at this article from the Cessna Owner Organization. There you will finally get an explanation for what you might initially have thought is a bad flight model or a faulty peripheral controller.

The solution? Firm but gentle pressure avoiding sharp yoke and pedal movements.

Posted on

An efficient way to practice landings

First, start a new flight, and select your aircraft.
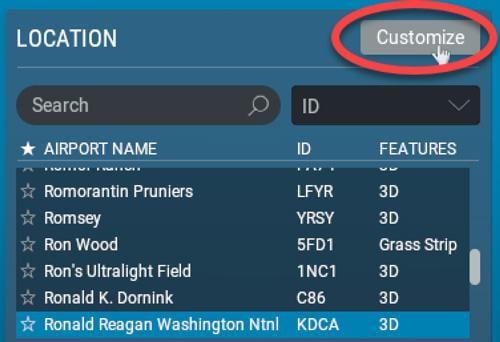
Then select your airport where you want to practice landing and click the Customize button:

image.jpeg

Click the RUNWAY toggle, choose your runway and select how far out you want to be positioned. Let’s say 3nm.
A blue arrow will appear on the chosen runway, showing your incoming direction.

image.jpeg

Click Confirm, and then Start Flight.
As soon as X-Plane loads, immediately press pause  image.jpeg and you will be positioned 3nm from the runway on the glideslope:
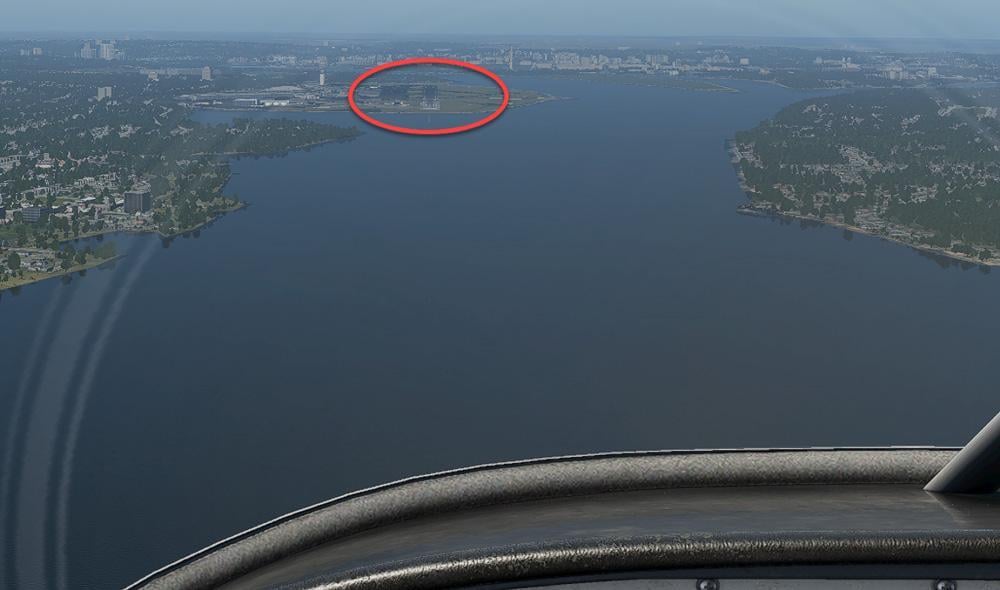
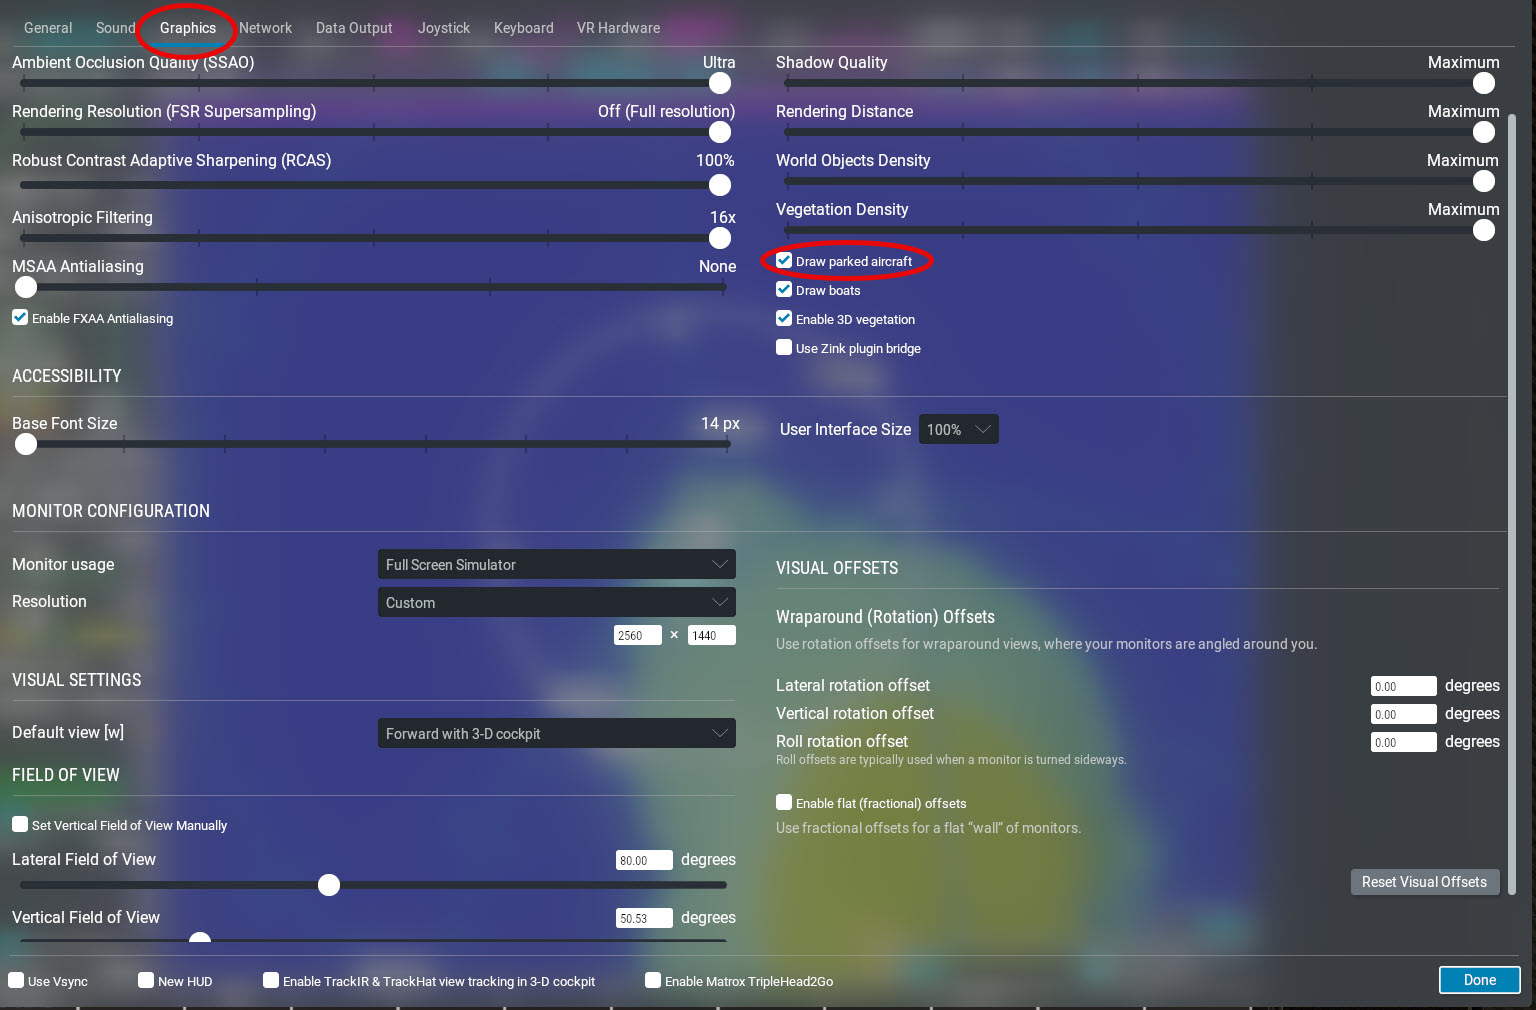
image.jpeg

Grab the Yoke/Stick,
adjust any necessary settings (like flaps, throttle, mixture etc)
and unpause image.jpeg

Fly your approach.

Posted on

Some Bullet-form Tips for Using X-Plane 12

Stability

  • Disable Unnecessary Plugins. Unused or incompatible plugins can tank performance. This is the #1 Stability tip of all time. Don’t just disable them; remove them from the directory hierarchy.
  • Optimize, but do not overclock your CPU or your graphics card
  • Cool your motherboard, RAM, and M2 SSDs. More than passive chassis fan cooling is required.
  • Use a UPS [UN-interruptible Power Supply] and an over-specced PSU [Power Supply Unit]

Graphics Optimization

  • Tweak Render Settings. Lower the visual effects (e.g., shadows, reflections, and antialiasing) if performance lags. Balance quality and frame rate for your hardware.
  • Try FSR (FidelityFX Super Resolution). X-Plane 12 supports AMD FSR, which can boost performance without significant visual loss.
  • Monitor VRAM Usage: High texture settings can overload your VRAM. Use the “Texture Quality” slider to optimize.

Aircraft Handling

  • Calibrate Controllers. Properly calibrate yokes, pedals, and throttle quadrants in the settings menu to ensure smooth aircraft control.
  • Adjust Control Sensitivity. Use the sensitivity sliders to fine-tune aircraft response, especially if it feels too twitchy.
  • Study the Flight Model Adjustment. X-Plane’s physics engine is advanced – experiment with “Flight Model per Frame” in the settings if you encounter unrealistic behaviour.

Weather System

  • Real Weather Accuracy. Ensure you’re connected to the internet for real-time weather updates. If the weather seems incorrect, force a refresh in the settings.
  • Adjust Turbulence Sensitivity. The new weather system is more dynamic. If turbulence feels overdone, tweak the realism sliders.

Customizing Views

  • Save Custom Camera Angles. Use the [Ctrl] + [number keys] to save cockpit or external views and quickly recall them with the corresponding number key.
  • Use Free Camera Mode. [c] or [Shift] + [4] activates free camera mode, great for screenshots or inspecting scenery.

Multiplayer and ATC

  • Use Default ATC. While not perfect, X-Plane 12’s ATC has improved tremendously over the past year. The latest update, 12.1.3 (about to be released – Time of writing: Late November), contains a huge ATC system update.
  • If you feel more confident, join online networks like VATSIM, IVAO, or PilotEdge for realistic ATC and multiplayer flying.

Posted on

Control your Static and Dynamic aircraft

This is a tip for new X-Plane users. While you have no control over the visibility of “object-based” static aircraft – these are permanently baked into the airport scenery by the airport designer – you do have some control over AI aircraft and also the aircraft that X-Plane populates at various gates.
You can tell X-Plane to populate the airport by going to Settings –> Graphics and checking or unchecking “Draw parked aircraft“:

Graphics-ParkedAircraft.jpg

In addition, you can control the number of dynamic AI aircraft in operation at the nearest airport by clicking the AI Aircraft button on the flight configuration screen:

AI Aircraft.jpg

And then click the Add Aircraft button to add another AI Aircraft. Click the EDIT button to change the number, type, and livery of the AI aircraft:

AddAircraft.jpg
Posted on

Plane spotting? Don’t park on the runway!

If you like plane-spotting and enjoy just watching the AI aircraft taxi-ing, taking off and landing and just generally experiencing the airport’s ambience without actually flying, don’t park on a runway or begin a flight from the end of a runway. If you do, X-Plane will act in a logical manner and wait for you to take off. AI activity will come to a stop while X-plane waits for you. If you are in the “ready for takeoff” position you may well find that an aircraft creeps up behind you and just stops and waits. Or sometimes all AI activity just simply stops. 
If you want to watch aircraft, rather park well off a runway, or even better, simply stay at your gate, press the C-30x30.jpg key for free camera movement, and “walk” about using your keyboard and right-mouse button.
Posted on

If it takes too long to decide where to fly…

There is a brilliant website worth visiting. It’s called nextsimflight

This site allows you to either specify your departure airport of choice or, alternatively, your arrival airport.
Then you specify the aircraft you want to use and how much time you have available – i.e., long you want the flight to last.
There are other optional parameters that you can fill in.

Once you have told nextsimflight what you want, a list of suggested destinations which satisfy your criteria appear.

Once you select one of the suggestions, another screen appears, giving you lots of useful information from which you can create your flight plan.

This site is amazingly handy – give it a try.

Nextsimflight.jpg
Posted on

Fix ATC Mid-flight

Sometimes, ATC does things that you are not happy with. It may “forget” to give you vectors or descent instructions; it may get choked up if too many AI aircraft are in the vicinity; it may get confused by a buggy airport… Conversely, sometimes ATC is quite correct, but you did something wrong with your flight plan, or did not read back, or did your own thing, or maybe you were “naughty” and got warned too many times: “Don’t transmit when the channel’s busy”.
To fix a sulky ATC, try asking for flight-following (if ATC will listen to you) and then canceling the flight-following service. Then, file a new plan (while in flight) and ask ATC for clearance. Hopefully, ATC will then behave itself.
Please remember that simulated ATC, in contrast to a real human controller (IRL or on Vatsim), is a mind-blowingly complex piece of programming. X-Plane’s ATC system is constantly undergoing big changes and improvements, so what does not work so well now may well work brilliantly after a few update cycles. If you compare ATC in the last version of X-Plane 11 with that of X-Plane 12 (current version), you will be amazed at the improvements.

Posted on

Keep the logbook “clean”

Serious pilots are fanatical about maintaining a “clean” log file. But we also sometimes want to make a flight (maybe for testing purposes) that we don’t want recorded.

There is a simple way to do this:

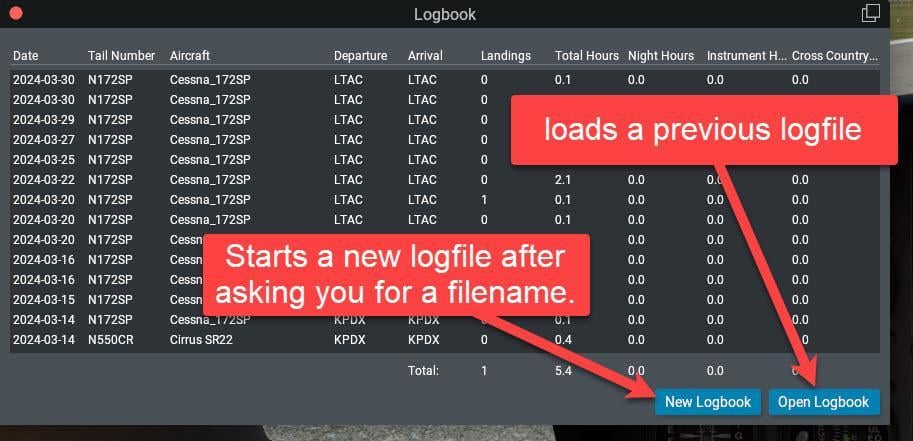
image.jpeg

First, click the New Logbook button and give it a filename (with a .txt extension). Save it in the …\Output\logbooks folder.

Quit X-Plane.

From now on, all your flying will be recorded in the new logbook file.

When you are ready to resume logging your real flights to your real logbook, click the Open Logbook button and select the real logbook file. 

Quit X-Plane.

From now on, all your flying will be appended to the “real” logbook file with no mention of all your experimental flights that you don’t want recorded.

Alternative

Take a look at the logbook feature in Little Navmap